mirror of https://git.tuxpa.in/a/code-server.git
2.3 KiB
2.3 KiB
Deploy on DigitalOcean
This tutorial shows you how to deploy code-server to a single node running on DigitalOcean.
If you're just starting out, we recommend installing code-server locally. It takes only a few minutes and lets you try out all of the features. You can also try out the IDE on a container hosted by Coder
Use the "Create Droplets" wizard
Open your DigitalOcean dashboard to create a new droplet
- Choose an image - Select the Distributions tab and then choose Ubuntu
- Choose a size - We recommend at least 4GB RAM and 2 CPU, more depending on team size and number of repositories/languages enabled.
- Launch your instance
- Open a terminal on your computer and SSH into your instance
example: ssh root@203.0.113.0
- Once in the SSH session, visit code-server releases page and copy the link to the download for the latest linux release
- In the shell run the below command with the URL from your clipboard
wget https://github.com/codercom/code-server/releases/download/0.1.4/code-server-linux - If you run into any permission errors when attempting to run the binary:
chmod +x code-server-linuxTo ensure the connection between you and your server is encrypted view our guide on securing your setup
- Finally start the code-server
sudo ./code-server-linux -p 80For instructions on how to keep the server running after you end your SSH session please checkout how to use systemd to start linux based services if they are killed
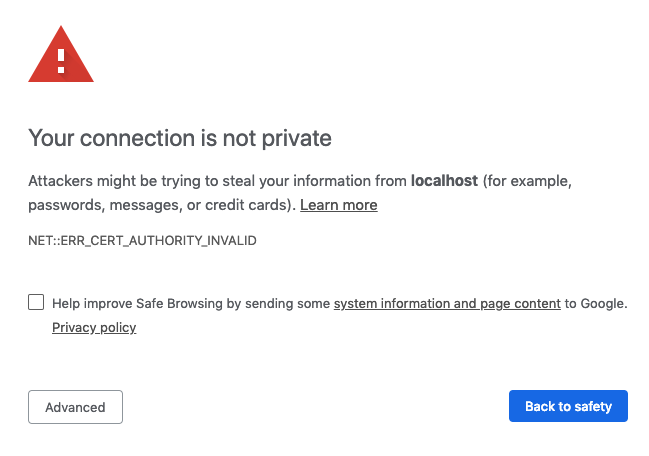
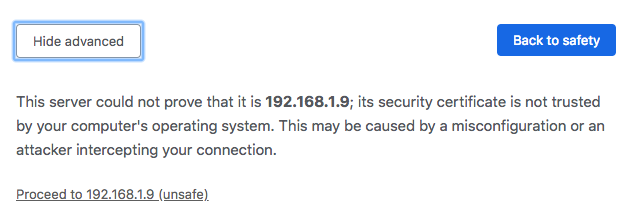
- When you visit the public IP for your Digital Ocean instance, you will be greeted with this page. Code-server is using a self-signed SSL certificate for easy setup. To proceed to the IDE, click "Advanced"
- Then click "proceed anyway"
NOTE: If you get stuck or need help, file an issue, tweet (@coderhq) or email.