5.1 KiB
Getting Started
code-server is used by developers at Azure, Google, Reddit, and more to give them access to VS Code in the browser.
Quickstart Guide
NOTE: If you get stuck or need help, file an issue, tweet (@coderhq) or email.
This document pertains to Coder-specific implementations of VS Code. For documentation on how to use VS Code itself, please refer to the official documentation for VS Code
It takes just a few minutes to get your own self-hosted server running. If
you've got a machine running macOS, Windows, or Linux, you're ready to start
the binary which listens on ports 8443 and 8444 by default.
- Visit the releases page and download the latest cli for your operating system.
- Double click the executable to run in the current directory.
- Copy the password that appears in the CLI.
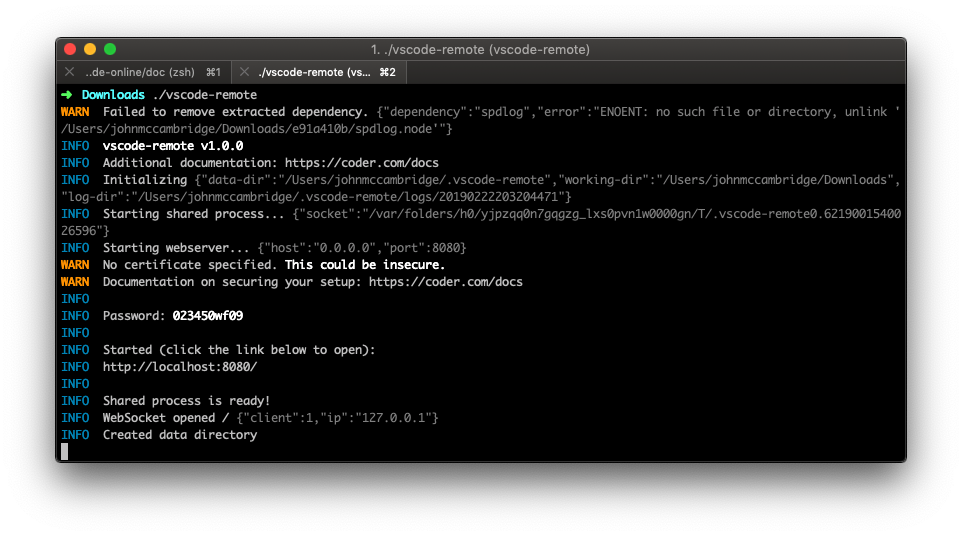
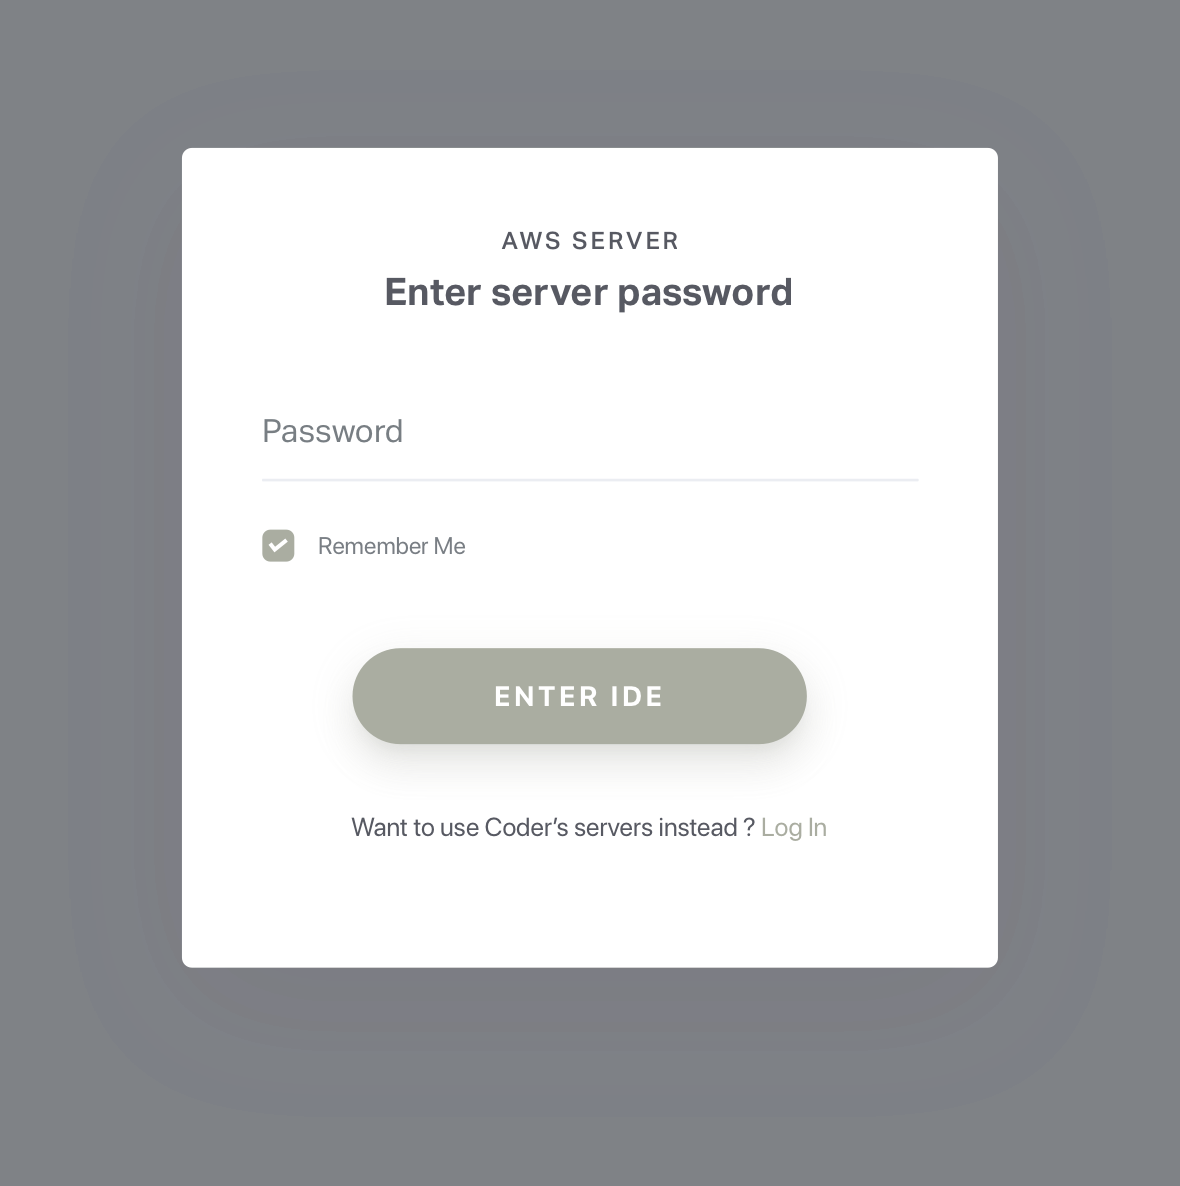
- In your browser navigate to
localhost:8443. - Paste the password from the cli into the login window.
NOTE: Be careful with your password as sharing it will grant those users access to your server's file system
Things To Know
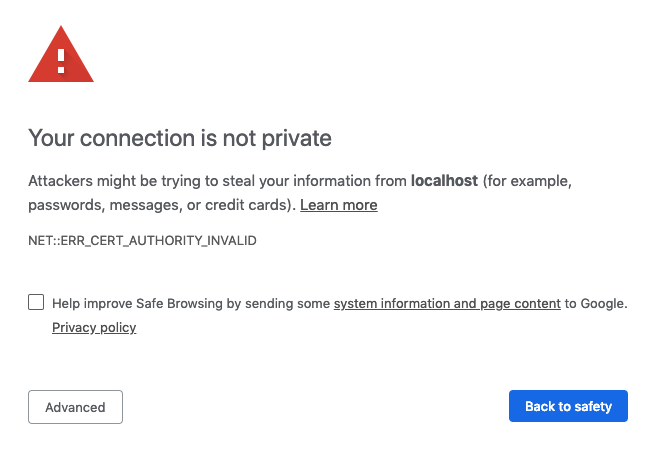
- When you visit the IP for your code-server instance, you will be greeted with
a page similar to the following screenshot. Code-server is using a
self-signed SSL certificate for easy setup. In Chrome/Chromium, click
"Advanced" then click "proceed anyway". In Firefox, click
Advanced, then Add Exception, then finally Confirm Security
Exception.
Usage
code-server --help
code-server can be ran with a number of arguments to customize your working directory, host, port, and SSL certificate.
Data Directory
Use code-server --user-data-dir path/to/directory to specify the root folder
that VS Code will start in.
Host
By default, code-server will use 127.0.0.1 for insecure connections and
0.0.0.0 for secure connections. This can be changed by using
code-server --host .
Example:
code-server --host 127.0.0.1
Open
You can have the server automatically open the VS Code in your browser on
startup by using the code-server -o or code-server --open flags
Port
By default, code-server will use 8443 as its port. This can be changed by
using code-server -p or code-server --port= followed by the port you want
to use.
Example:
code-server -p 9000
Cert and Cert Key
To encrypt the traffic between the browser and server use code-server --cert
followed by the path to your .cer file. Additionally, you can use certificate
keys with code-server --cert-key followed by the path to your .key file.
Example:
code-server --cert /path/to/certificate/fullchain.cer --cert-key /path/to/certificate/fullchain.key
Example for Let's Encrypt:
code-server --cert /etc/letsencrypt/live/example.com/fullchain.pem --cert-key /etc/letsencrypt/live/example.com/privkey.key
To ensure the connection between you and your server is encrypted view our guide on securing your setup.
Nginx Reverse Proxy
Below is a virtual host example that works with code-server. Please also pass
--allow-http and --trust-proxy to code-server to allow the proxy to
connect. You can also use Let's Encrypt to get a SSL certificates for free.
server {
  listen 80;
  listen [::]:80;
  server_name code.example.com code.example.org;
  location / {
      proxy_pass http://localhost:8443/;
      proxy_set_header Upgrade $http_upgrade;
      proxy_set_header Connection upgrade;
      proxy_set_header Accept-Encoding gzip;
  }
}
Apache Reverse Proxy
Example of an HTTPS virtualhost configuration for Apache as a reverse proxy.
Please also pass --allow-http and --trust-proxy to code-server to allow the
proxy to connect. You can also use Let's Encrypt to get a SSL certificates for
free.
<VirtualHost *:80>
  ServerName code.example.com

  RewriteEngine On
  RewriteCond %{HTTP:Upgrade} =websocket [NC]
  RewriteRule /(.*)           ws://localhost:8443/$1 [P,L]
  RewriteCond %{HTTP:Upgrade} !=websocket [NC]
  RewriteRule /(.*)           http://localhost:8443/$1 [P,L]

  ProxyRequests off

  RequestHeader set X-Forwarded-Proto https
  RequestHeader set X-Forwarded-Port 443

  ProxyPass / http://localhost:8443/ nocanon
  ProxyPassReverse / http://localhost:8443/

</VirtualHost>
Important: For more details about Apache reverse proxy configuration checkout the documentation - especially the Securing your Server section.
Help
Use code-server --help to view the usage for the CLI.